Initially, I looked into hiring a landscaping company to do the work for me. Finding the right stones was proving difficult, I had no way to transport such stone, and having to learn how to cut and shape flagstone was proving a bit too much work.
However, a fews days back I stumbled upon an assortment of large faux stepping stones at a nearby hardscape supply company (Seasons Supply).
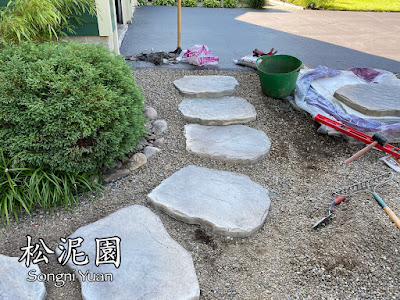
These stones, manufactured by Rosetta, were perfect in size, shape, and color. I bought a full pallet with eight different shapes, plus I added four more for a total of twenty stones. In the end, I only needed 18 to complete the stepping stone pathway. The remaining two I will use at the garage side and rear door entry ways.
Even though these stones are faux, they look real. The texture is authentic, and the gray color matches my existing pea stone. Each stone is very heavy, and they appeared to be made in a way that has metal fibers within to strengthen the concrete.
I didn't need a lot of additional materials for the install given that the entire area of the stroll garden is just sandy soil. All I had to do was level out a spot for each stone and dry-set it in place.
There is plenty of drainage and as long as there are no pea-stones or rock underneath, the stepping stones will be fine and shouldn't crack over time.
The stairs near the edge of the driveway was a bit more complicated. I had to use a combination of gravel and paver sand to fit them in. There has always been a deep layer of gravel along the edge of the drive way to accommodate a camper that once rolled in and out of this spot before I converted it to garden space.
I overlapped the first three stones just a bit so as to ensure that the stairs would be more stable. Given the weight of each stone, and the substantial layer of gravel and sand beneath, I don't think they will move much. We will have to see how they rest after the first winter.
I'm sure a professional contractor would have wanted larger stones for steps and lots of cement, but my goal is to keep costs down. I also don't want it to look overly landscaped. A bit goofy is o.k., as long as the stones remain in place and don't cause anyone to fall.
The stones look fantastic, exactly how I envisioned them.
Additionally, I saved about $2,000 by doing all the work myself. They only other expense besides about $600, was an aching back. In the end, it was worth it.


