Saturday, August 26, 2017

Flowerette

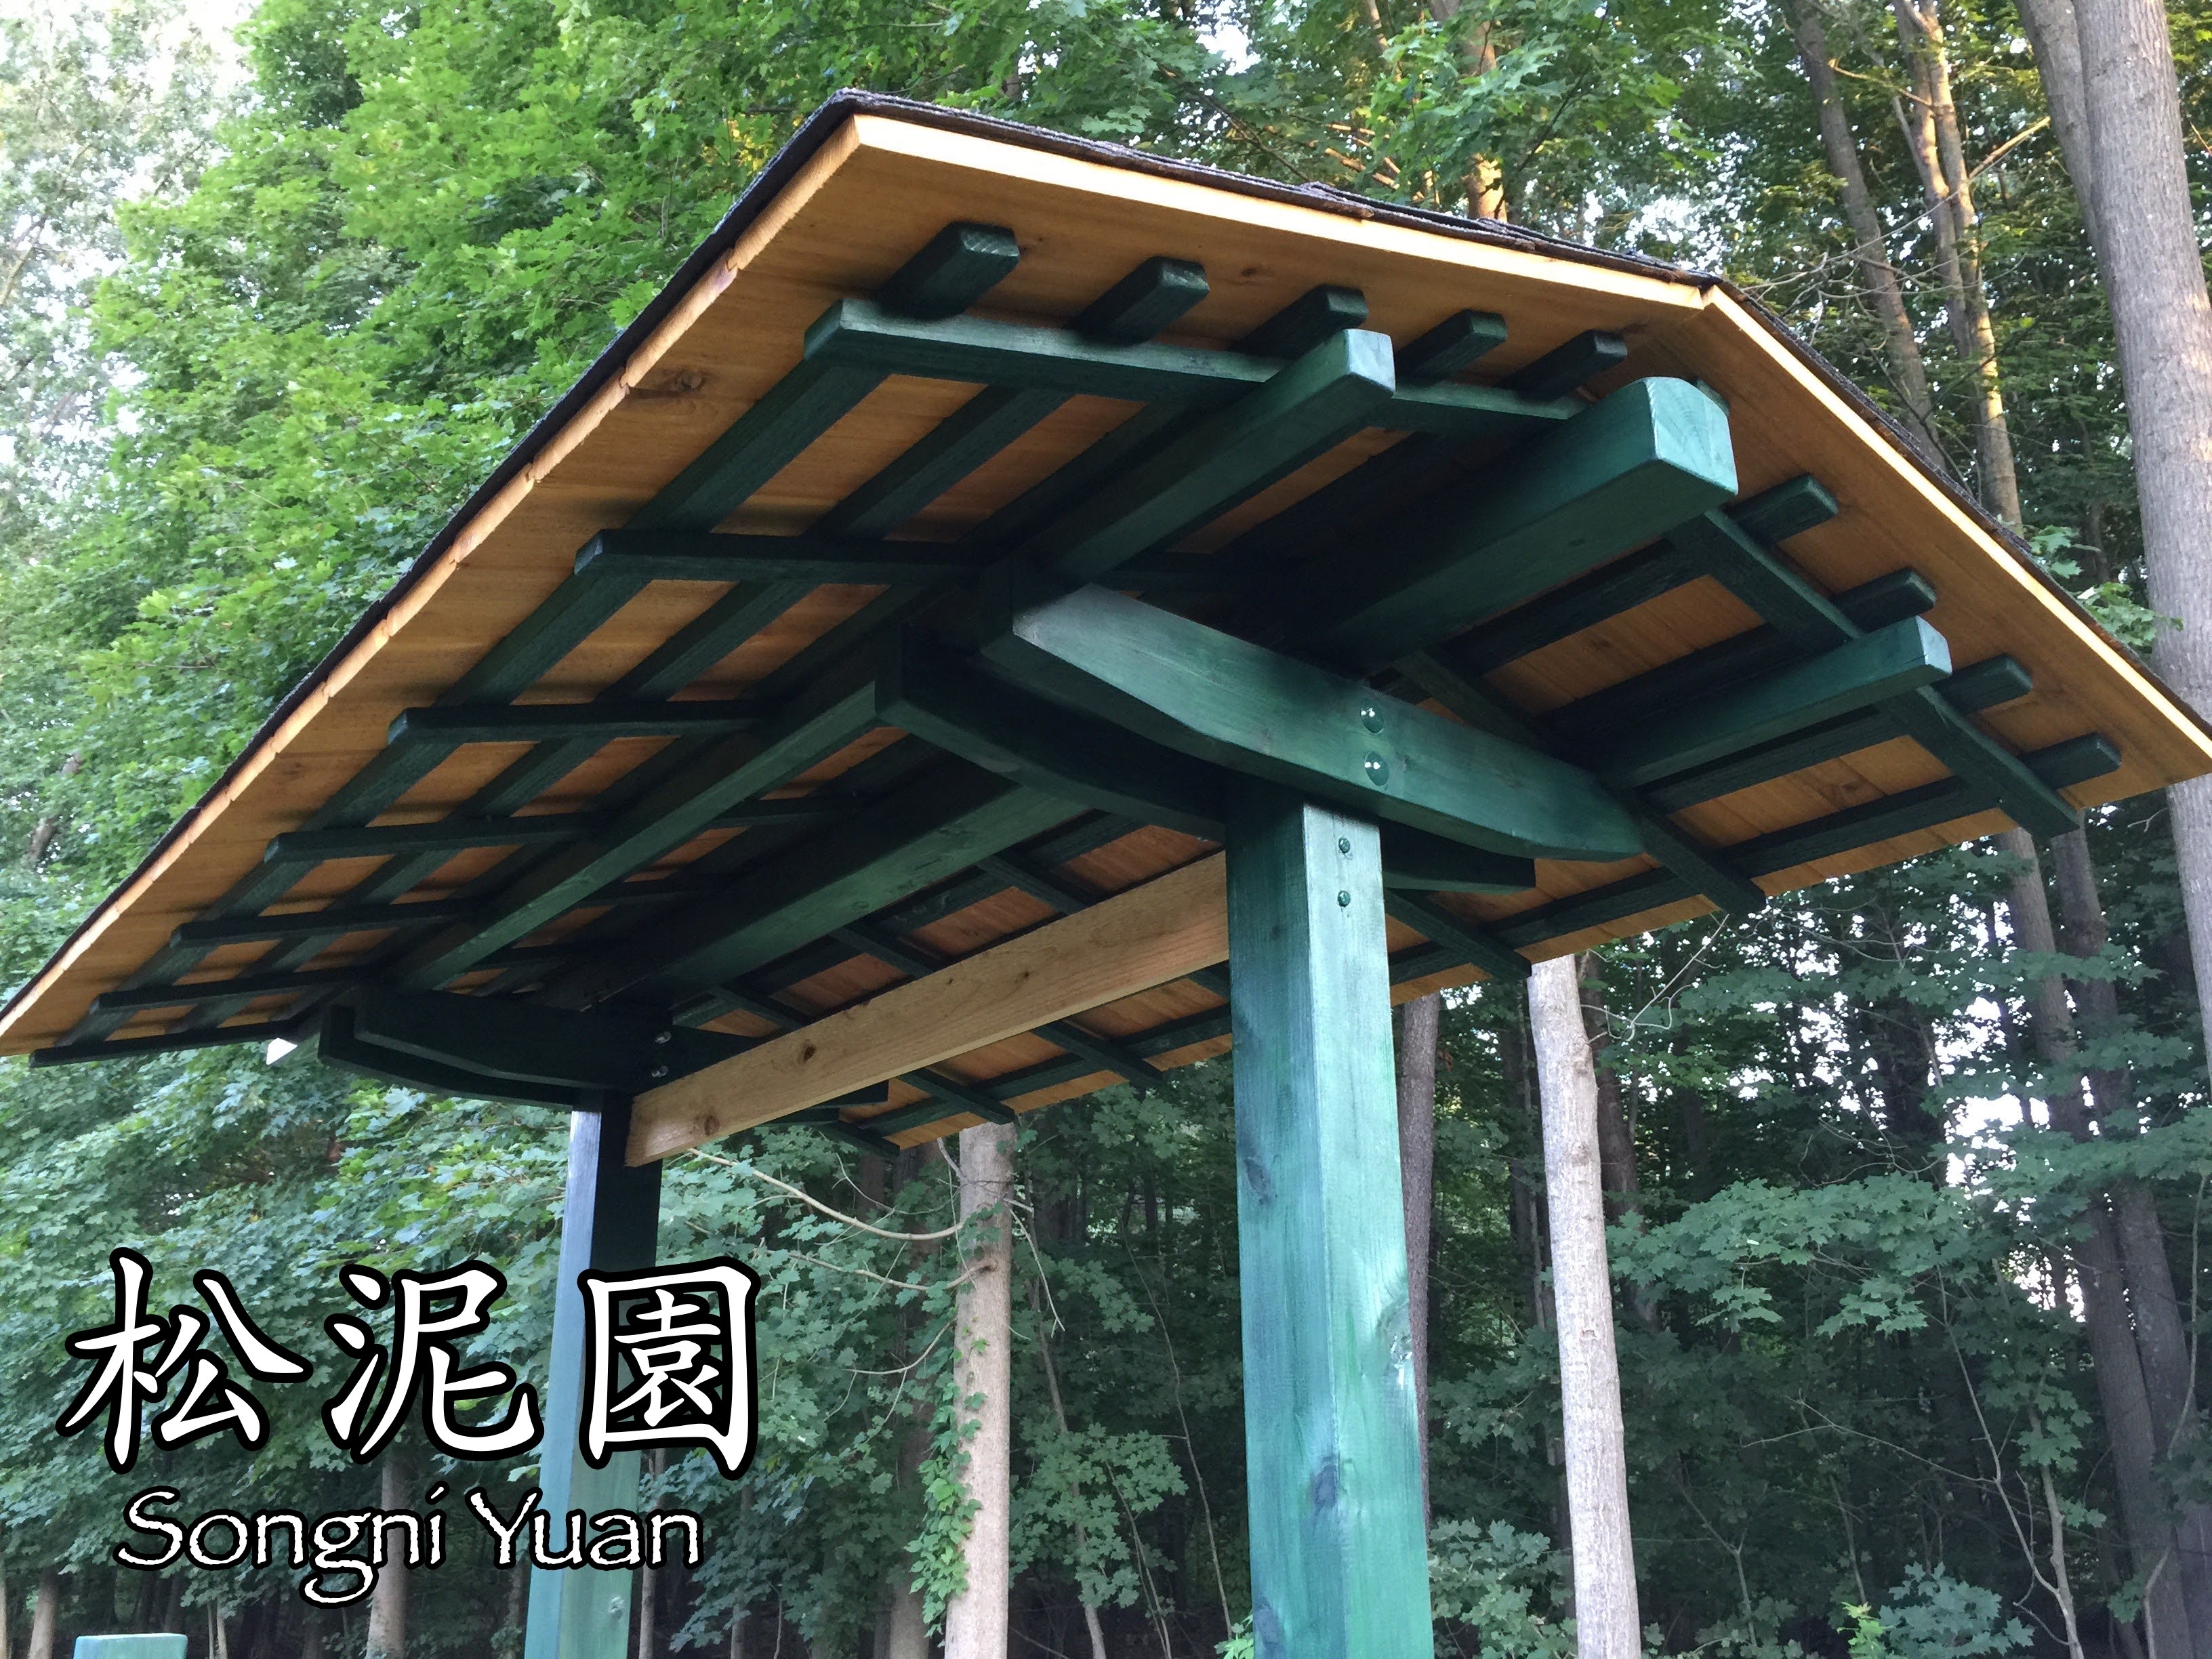
The wooden ornament flowers I ordered finally arrived and after staining them, I attached them to both ends of the main post of the gate. This is the only decoration I am adding to the gate.


I think they look nice. They add a bit of differentiation in terms of stain color, matching the underside of the roof. They also match the wooden flower ornaments I placed on the garden bell a couple years ago.

Bell Ornament

I'm still waiting for the two remaining post caps for the side buttress posts. After that, I may work on putting a stone threshold down, probably naturally shaped pavers - I have to keep my costs down. 


However, school starts soon, so I may have to wait till next summer to get this done.

Friday, August 18, 2017

The Name Game

After finishing the building of the new gate, I had to decide on a name for the structure. 


Given that it is placed along the property line in the Dragon Spine area, and that the property behind that line is a wood lot, I decided to name the gate the Woodland Gate, or in Chinese: Líndì mén.


The translation/characters in Japanese would be slightly different, but given that I have a background in Chinese language and have already used Chinese to name the garden, I thought I would keep using Chinese as the naming structure for elements in the garden.

Since the gate will be used primarily to view/access the woodlot, the name is appropriate. 

Now I have to find a sign maker who can carve a sign for the gate that is similar to the signs I have for the garden elsewhere. This time around my duaghter is not in Taiwan, so I will need to locate someone local. It might take a while.

The Woodland Gate

I have spent a great deal of time working on building the gate along the Dragon's Spine. So much so, that I have neglected my other duties in the garden. However, I have finished 98% of the gate at this time.

Having never done a roofed gate before, and having no actual measurements from which to work, I was forced to make adjustments throughout the process. I now know what and how I would do things differently, but in the end, I am satisfied with the results.

The final product no longer looks like a giant chair, a concern I had from the first few days.


I made a major adjustment by relocating the front buttresses closer to the main posts. Doing so also brought the buttresses under the roof line, make it it proportionally more accurate.

before adjustment

after adjustment

I then continued to work on the roof supports.


After initially finishing and adding the roof, I became concerned that there was not enough stability (especially after adding the shingles) and decided to add two more side buttresses. The roof added an enormous amount of weight to the two 4 x 4 main posts. The fact that the post rested on cemented-in brackets rather than being cemented into the ground resulted in a swaying from side to side that was not safe. Once the side buttresses were added the stability was reinforced and is no longer a concern (however, I will have to keep an eye that snow does not accumulate on the roof during the winter.

without side buttresses

with side buttresses

I still have to add two more copper caps to the buttress tops and two small wooden flower medallions to the main post as decorative elements. Otherwise, I am done building.


Its not a 100% Sukiya Style gate - I cheated by using bolts and other hardware (most of which isn't visible. I also didn't use actual cedar shingles for the roof, but the asphalt shingles I did use still look pretty good. The side buttresses are a bit odd and inauthentic, but they worked well to stabilize the structure and keep within the style I was aiming for. Its not perfect and purists/experts will probably find fault with much of what I did, but honestly, I don't care. Its my gate, reflects my tastes, and comes pretty damn close to the real thing. Best of all, I can say "I built that."


Lets just hope it doesn't collapse on anyone.

Wednesday, July 26, 2017

The Postman

Now that the Japanese Yew is out of the way, I could start to work on the support posts for the gate. I started by digging a couple of post holes in front of the main posts. Once dug I placed an 8 x 4 x 4 cedar post in each. I decided this time to cement them into the ground.


The first two gates I built did not get cemented support posts. The main garden entrance gate didn't budge. The supporting posts for the large back gate shifted a bit, but not enough that I have had to fix them.

Given that this new gate is going to have a roof, I didn't want to take a chance, so cement it was. I also decided to brace the posts in place with temporary supports that I screwed in. This ensured that the posts were exactly where I wanted them in relation to the main posts and that they wouldn't budge while I poured the cement. Doing this alone was tough, especially since the cement I used was quick setting. I had to watch my timing and make sure everything was in place before I started, hence the temporary support posts.

I also installed the crosspiece to add some stability to the main posts - they are only bolted to brackets and have been moving a bit. Once everything was all secure, I pored the cement.

Later, I attached the cross supports with bolts, further securing the structure. I then removed the temporary cross supports.


It took almost the full day to get all this done. Its secure, but sort of looks odd, like I am building a giant chair. Doesn't really look like a gate at this point. Honestly, I am worried. The proportions seem off. I am using formulas I obtained from the Journal of Japanese Gardening, but I might be messing it up. For instance, I know that I extended the support posts too far from the main posts, about twice the distance I should have. Its how I did my previous gates, and I am worried about the main posts only being bolted down. I am hoping the wider span will help support the main posts better by spreading out the support. I am no engineer, so I could be wrong. Only time will tell. It may not look authentic when done, but in the end it will either work or I will have a very goofy looking gate.

I'm o.k with goofy.

Monday, July 24, 2017

Moving Day

Today I dug up and removed two Japanese Yew that were planted along the Dragon's Spine area back in 2010.


Originally, there were four. Two are now located along the back of the house and have been doing well. 

The two left along the Dragon's Spine had years when they grew well, and years when they did not, depending on if I kept them covered with netting during the winter to keep deer away. Unfortunately, this last winter I didn't cover them and the deer munched them down considerably. 

As part of my plan to rework the Dragon's Spine, I decided to move the two Yew to the stroll area along the fence line. I placed them on either side of the newly planted Mikawa yatsubusa Japanese Maple


I also had to split and move a couple of Hosta that were already in that location. After splitting them, I used them to fill in some of the gaps in the mulch bed.

I also moved a small Blue Star Juniper that I had planted in this area last year. I moved it from the left side of the Maple to the right.


In time, I am hopeful that the yew will do well here. They will eventually fill in from the deer damage and in time I should be able to reshape the overall plants.

Now that the yews are gone, the Dragon's Spine looks sparse. 


However, with the main gate posts attached to the brackets, you can start to see where the gate will be located, and all of the landscaping in front that now needs to be redone.

Wednesday, July 19, 2017

A Gift From the Gods

As I travel around the country this summer visiting Japanese gardens, I have been in search of a gate style that I might be able to build as part of my plans to add a gate to the Dragon's Spine area in my backyard.

Many have been too large or too complex for my level of skill and budget. I also want a small, simple, single passageway gate.

Anderson Gardens

Garden of the Phoenix

Bloedel Reserve

Yao Garden

Yashiro

This week, while visiting the Anderson Gardens in Illinois, I stumbled on the perfect gate.


This gate meets all my criteria. Small, single passage, and not too complicated. In fact, its perfect. It uses 4 x 4 posts as its primary support. Two on either side and one as the top cross beam. 


The roof supports are still mortised together, but I might be able to pull that off with the right tools. At the very least, I can create two supports on either side of the post and use bolts (my original plan).

I'm not a fan of the natural timber cross piece and will probably use a milled 1 x 6 cedar board instead.


I was vey glad to see this structure. An authentic looking gate with 4 x 4 posts - a gift from the gods.

Saturday, July 15, 2017

Nurture and Grow

I picked up this Verdon Hinoke Cypress (Chamaecyparis obtusa 'verdoni') in a discarded on-sale pile. The nursery thought it was a doomed plant. I on the other hand, saw a plant that I could nurture and shape. It already had the characteristics of a bonsai-like plant. I'm thinking with some care and attention, I can turn it into an interesting visual addition to the garden.


As a compact evergreen conifer, it will grow upright, with a wide conical and somewhat contorted habit. This should help to add interest. It likes full sun to part shade and could grow to 3-8' tall 2-3' wide if left unchecked. However, I plan to cut it back and shape it over time, assuming it survives. I have had trouble with this spot in the past, mostly from animals eating the plants I place here. I am hoping that they will not be interested in this Cypress (deer are unlikely to get into this area of the garden.


In time, I think it will look good just behind the lantern.

Just Dandy

I added a small plant to the north-side bed of the Zen garden. It was a Chamaecyparis obtusa 'Just Dandy' that I purchased for a few dollars.


It will grow about 1-3" per year and get to be the size of a beach ball in a couple of years. I like that it maintains its globe shape and it should do well in sun to part shade.


In order to get it into this rock lined bed, I had to remove one large stone to give it more space to grow than was available in the little space that already existed. As it grows, it should fill in the space nicely.