Wednesday, May 25, 2022

Patient Buddha

During the rebuilding of the garden fence, I haven’t had much time to tend to plants. Still, it is impossible to ignore the beauty of the Bugleweed growing in front of Buddha. It’s reaching full bloom this week and the purple color is outstanding.

Unfortunately, the new fence panels won’t be installed until the colorful bloom passes. Hopefully, next year will look as nice with a different backdrop.

Saturday, May 21, 2022

First Flame

I was visiting a local nursery, with no plans to buy, just browse. However, as usual, I could not control myself.

I loved the way that the Crabapple tree I planted in the stroll garden last year had turned out. 

It blocks the view of my neighbor's house, made a great transition point between the viewing garden and the stroll garden, and the blossoms this spring were spectacular.

The problem was that at the opposite end of the garden, just behind the small Moon Lantern, there was a void that I felt needed to be filled.

Primarily, the view near and above the fence was characterized by the large Snowmound Spiraea, a telephone pole, and an open view of the neighbors across the street.

I thought having a similar sized tree, but a different variety, would help add some balance to the view.

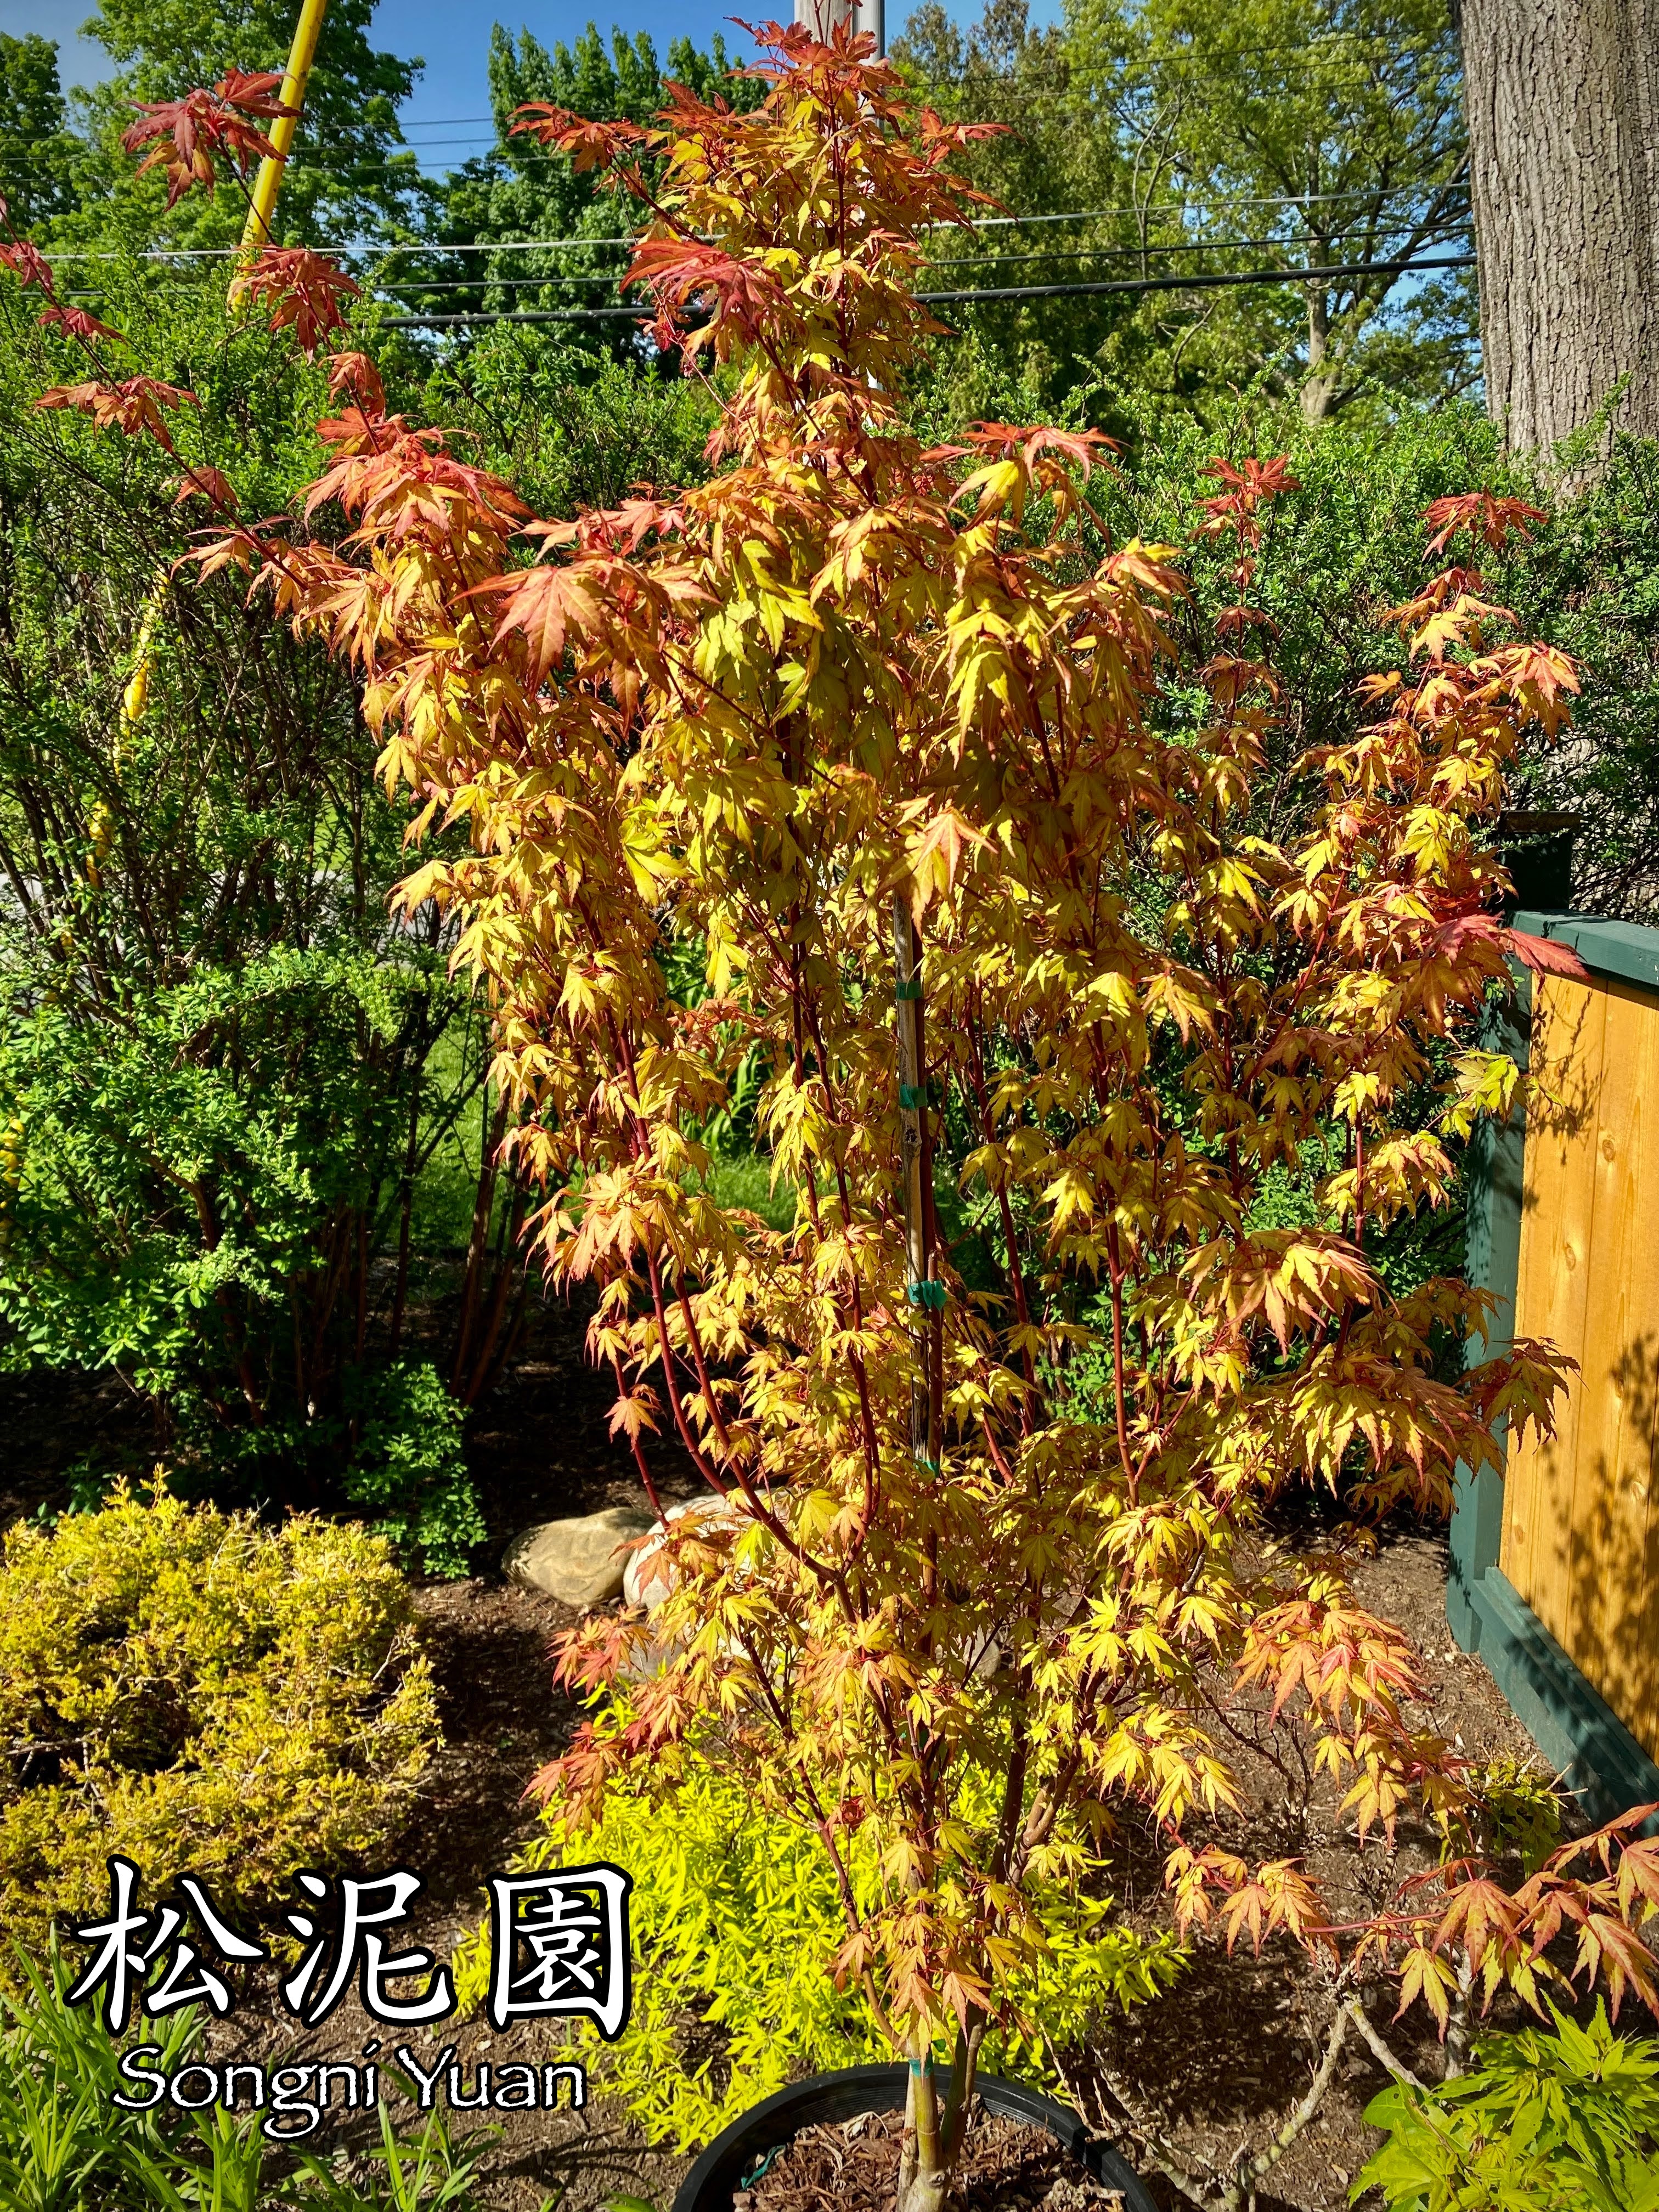
While at the nursery, I stumbled upon a tree that immediately caught my attention. A First Flame Maple "Iseli Introduction" (Acer x pseudosieboldianum)

This maple has star shaped leaves that are a bright red-orange. The colors were more fall-like than spring. Mid-summer, the leaves should turn a light green. However, the red-orange leaves should continue to emerge throughout the summer.

Over time, the tree will grow to 20' H and 15' W, but it can be trimmed as easy as any other Acer type maple tree, like my dwarfs I have elsewhere in the garden. 

I also think it will help to distract from the telephone pole as well, and be well centered with the lantern and rock in the viewing area of the garden.

I love the color and think it will make a nice addition to the viewing garden, adding a fall-like interest all summer.


Later in the week I will move some existing plants around, prep and amend the soil, and plant the tree.

Saturday, May 14, 2022

Like Clouds Floating in the Sky

Pink blossoms abound 
Like clouds floating in the sky 
Dreams of Kosokuji
     - D. Besozzi

The Crabapple tree (Mrs. Krabappel) reached full bloom this weekend. I was very happy to see it come to full life and start another season.


Not only is the tree beautiful, but I am very satisfied with the placement of the tree. It does much to hide the large Oak in the background and the unsightly telephone pole.


The blossoms are really spectacular when viewed up close, and there are so many!


It was a real joy to see and I made sure to photographically document the bloom. I knew that this beauty would not last. The cycle of life and rebirth must go on. Like every moment of life, this joy would be fleeting. Fortunately, the blooming flowers lasted a solid 48 hours before the arrival of torrential rains that scattered the blossoms about.


Raindrops from the sky
Blossoms gently fall downward
I return to work
      - D. Besozzi

Tuesday, May 10, 2022

Let the Blooming Begin!

With the arrival of spring and warmer weather, I have been waiting for the Crabapple tree (Mrs. Krabappel) that I planted last year to flower.

As of May 5th, there were no flowers, but the leaves were a nice bright red. 

I have been checking daily, as other trees in the neighborhood were blooming all around. I was beginning to wonder if Mrs. Krabappel would even flower this year.

However, this afternoon I discovered the first bloom. 


How exciting! It's beautiful! 

Now I will wait and see what the next few days offer. I'm hoping to see more blooms.

Sunday, May 8, 2022

Laying Rails

With new fence posts in, it was now time to add fence rails.

One major change I made with this new fence design was to use of OWT Ornamental Wood Ties 2 x 4" Top Rail Saddles. The saddles are powder-coated metal and very solid. 

They could be installed at 90 degrees or perpendicular, allowing them to be used for the top rail and the bottom rail design I am employing.

They were easy to install. By placing one end of the 2 x 4 into a saddle while I worked at the other end, it allowed me to install the rails without any human assistance. 

They should also reduce a rot issue I encountered with the old fence design. Originally, I attached each rail with two screws from the top. Over a decade, water seeped into the screw holes and compromise the ability of the screws to support the rails, especially along the bottom rails which were often below the snow line in the winter. These saddles should reduce the likelihood of that occurring.

Another change I made was to use two 2 x 4s, one vertical, and the other horizontal, for the bottom rail support (similar to the fence I built last year in the stroll garden)

I did this because this new design will use cedar boards instead of bamboo. Originally, the bamboo looked great the first two or three years after installation:

2018

Eventually the bamboo faded with age and was starting to look sad. 

2021

I am also hoping to keep some continuity between the fences throughout the garden areas, especially after the design change used in the Stroll Garden fence. In addition, the strengthening of this bottom rail will help lessen the possibility of the bottom rail bowing, a constant problem of the old fence design that had only a single 2 x 4 for the bottom rail.

I still have to attach the top portion of the bottom rail. I am hoping to recycle some of the top sections of 2 x 4s from the old fence. The bottoms, unfortunately, were in poor and rotted condition and had to be discarded. As a result, the bottom portions of the new fence consist of brand new 2 x 4 boards. The previous tops are still in great shape since they were never below the snow line, so reusing them should help save some money.

Wednesday, May 4, 2022

The Post Man

Since the last blog post I have been working on rebuilding the fence. First, I hired a neighbor's son to help me dig the post holes and remove the old posts. I was worried that it might be too difficult given my recent cardiac health crisis. Together, we were able to dig out the old posts and open up the post holes. As expected, the posts near the bottom were mostly solid. It was the transition zone between the soil and air were the main rot occurred.

After improving the post holes, I placed the new posts in essentially the same location as last time. 

I considered moving the Moon Window to center it with the walkway, but the dwarf Maple that was planed on the other side would not have been centered. 

So, I settled on keeping the fence the same. Most of the posts were easy to re-post, and the new post protectors on the bottom were easy to install. I tried my best to keep each protector between 10-11" above the soil. 

The last post was the most difficult because it was located where the old fence and gate met at a corner. It was also attached to the new fence I installed last year in the stroll garden. It appeared to be solid, but a test dig revealed similar rot. It was only solid because it was being held in place by the other two fence sections. Given its similar age and condition to the other posts, it seemed prudent to replace it and add a post protector. Doing so without compromising the other two fence sections was no easy task.

Once in, it was solid and will last as long as all the other new posts.

The next step will be to start adding rails.